PDF p. 1284 · 24-21
Some SRS system connectors have a spring-loaded lock.
Disconnecting
To release the lock, pull the spring-loaded sleeve towards the stop while holding the opposite half of the connector. Then pull the connector halves apart. Be sure to pull on the sleeve and not on the connector half.
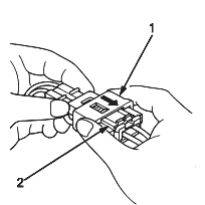
- 1. SPRING-LOADED SLEEVE
- 2. STOP
Connecting
- 1.Hold the pawl-side connector half and press on the back of the sleeve-side connector half in the directions shown. As the two connector halves are pressed together, the sleeve is pushed back by the pawl. Do not touch the sleeve.
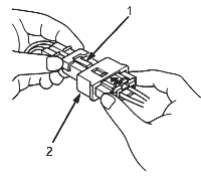
- 1. PAWL
- 2. SPRING-LOADED SLEEVE
- 2.When the connector halves are completely connected, the pawl is released and the spring-loaded sleeve locks the connector.
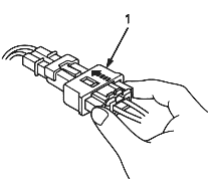
- 1. SPRING-LOADED SLEEVE
Backprobing Spring-loaded Lock Connectors
- When checking voltage or resistance on this type of connector the first time, it is necessary to remove the retainer to insert the tester probe from the wire side. It is not necessary to reinstall the removed retainer; the terminals will stay locked in the connector housing.
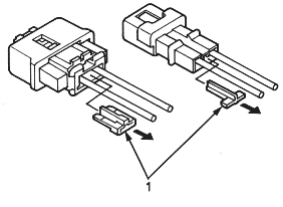
- 1. RETAINER
* Discard after removal
- To remove the retainer, insert a flat-tip screwdriver between the connector body and the retainer, then carefully pry out the retainer. Take care not to break the connector.
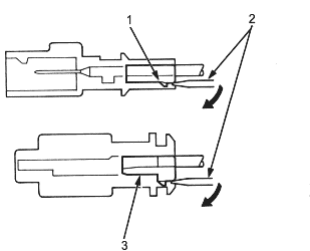
- 1. RETAINER
- 2. FLAT-TIP SCREWDRIVER
- 3. RETAINER