PDF p. 222 · 4-38
- 1.Pull off the rear bearing.
- Make sure the tips of the bearing puller jaws are thin enough to fit between the bearing and the slip rings.
- Do not reused the bearing.
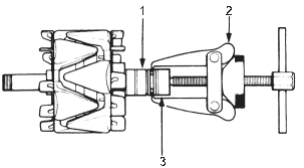
- 1. SLIP RINGS
- 2. BEARING PULLER
- 3. REAR BEARING
- 2.Use a hand press to install the new bearing. Apply pressure only on the inner race to avoid damaging the bearing.
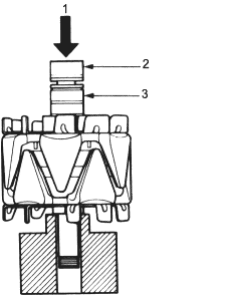
- 1. PRESS
- 2. REAR BEARING
- 3. SLIP RING
Alternator Reassembly (MITSUBISHI)
- 1.Push the brushes in, then insert a pin or drill bit (about 1.8 mm diameter) to hold them there.
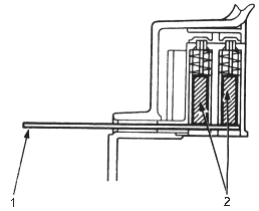
- 1. PIN
- 2. BRUSHES
- 2.Heat the rear bearing seat in the rear housing (See page 4-34). After heating, continue immediately with assembling before the rear bearing seat cools completely.
- 3.Put the rear housing/stator assembly and drive-end housing/rotor assembly together, tighten the four through bolts and pull out the pin.
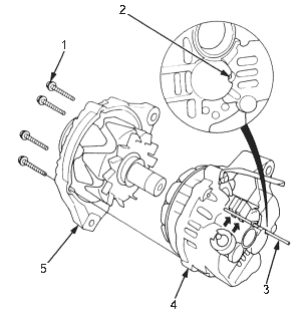
- 1. THROUGH BOLT
- 2. BRUSH ACCESS HOLE
- 3. PIN
- 4. REAR HOUSING/STATOR ASSEMBLY
- 5. DRIVE-END HOUSING/ROTOR ASSEMBLY
- 4.After assembling the alternator, turn the pulley by hand to make sure the rotor rotates smoothly and without noise.