PDF p. 1172 · 23-D-6
- 1.Remove the front bumper (see section 20).
- 2.Disconnect the connectors from the headlights.
- 3.Remove the two mounting bolts from the corner upper beam.
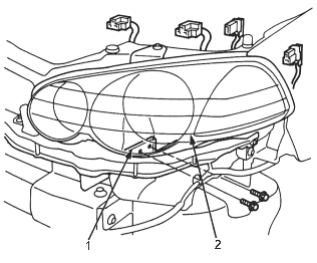
- 1. CORNER UPPER BEAM
- 2. HEADLIGHT ASSEMBLY
- 4.Remove the four mounting bolts, then remove the headlight assembly.
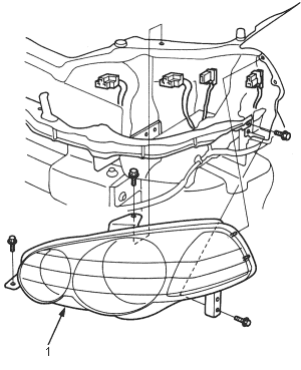
- 1. HEADLIGHT ASSEMBLY
HEADLIGHT (LOW BEAM): 55W
HEADLIGHT (HIGH BEAM): 55W
FRONT PARKING LIGHT: 5W
FRONT TURN SIGNAL LIGHT: 21W
- 5.After replacement, adjust the headlight to local requirements.
PDF p. 1173 · 23-D-7
Before adjusting the headlights:
- Park the vehicle on level ground.
- Make sure the fuel tank is full.
- The driver or someone who weighs about the same should sit in the driver’s seat.
- Load the trunk with the items normally carried.
- Push down on the front and rear bumpers several times to make sure the vehicle is sitting normally.
- 1.Open the hood.
- 2.
Adjust the headlights to local requirements by turning the adjusters.
NOTE: As the outer lenses are made of a resin material, do not cover the headlights when they are turned on.
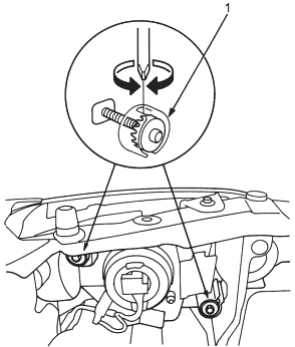
- 1. ADJUSTER
Side Turn Signal Lights
Replacement
- 1.Push the retaining spring and remove the side turn signal light.
- 2.Remove the bulb socket from the light housing and replace the bulb.
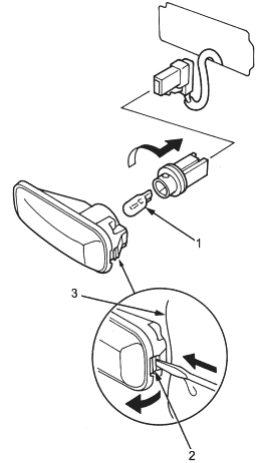
- 1. BULB (5W)
- 2. RETAINING SPRING
- 3. PROTECTIVE CLOTH