PDF p. 1091 · 22-36
NOTE: LHD type is shown, RHD type is similar.
- 1.Discharge the refrigerant (See Page 22-38).
- 2.Disconnect the condenser fan connector and remove the wire harness clips and the compressor clutch connector from the condenser fan shroud.
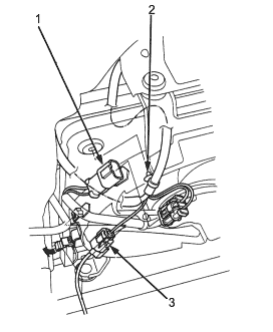
- 1. CONDENSER FAN CONNECTOR
- 2. CLIP
- 3. COMPRESSOR CLUTCH CONNECTOR
- 3.Remove the bolt, then disconnect the discharge line from the condenser. Plug or cap the lines immediately after disconnecting them to avoid moisture and dust contamination.
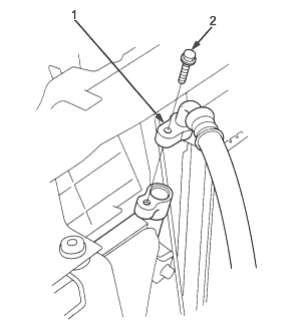
- 1. DISCHARGE LINE
- 2. 6 x 1.0 mm, 9.8 Nm (1.0 kgf/m, 7.2 lbf/ft)
- 4.Remove the wire harness clip, bolts and upper mount bracket.
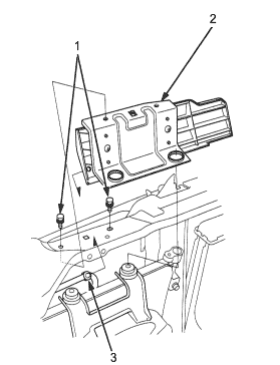
- 1. 6 x 1.0 mm, 9.8 Nm (1.0 kgf/m, 7.2 lbf/ft)
- 2. UPPER MOUNT BRACKET
- 3. CLIP
- 5.Remove the bolt then disconnect the condenser line from the condenser. Plug or cap the lines to immediately after disconnecting them to avoid moisture and dust contamination.
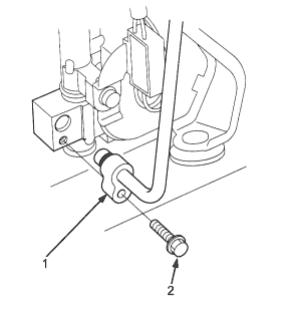
- 1. CONDENSER LINE
- 2. 6 x 1.00 mm 9.8 Nm (1.0 kgf/m, 7.2 lbf/ft)
PDF p. 1092 · 22-37
- 6.Remove the condenser assembly by lifting it up. Be careful not to damage the condenser fins when removing the condenser assembly.
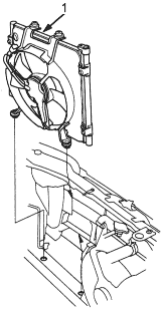
- 1. CONDENSER ASSEMBLY
- 7.Install in the reverse order of removal and note the following items:
- If you are installing a new condenser, add refrigerant oil (KEIHIN SP-10) (See Page 22-24).
- Replace the O- rings with new ones at each fitting and apply a thin coat of refrigerant oil before installing them. Be sure to use the correct O-rings for HFC-134a (R-134a) to avoid leakage.
- Be careful not to damage the condenser fins when installing the condenser assembly.
- Charge the system (See Page 22-40) and test its performance (See Page 22-42).
A/C Filter
Replacement
NOTE: LHD type is shown, RHD type is symmetrical.
- 1.Remove the glove box (see section20).
- 2.Remove the filter lid from the evaporator, then pull out the lower A/C filter and the upper A/C filter.
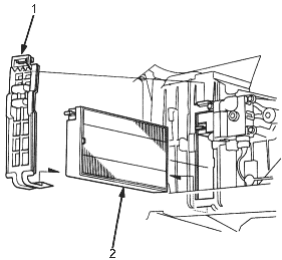
- 1. FILTER LID
- 2. LOWER A/C FILTER
- 3.Remove the filter from the housing. Replace the filter according to the maintenance schedule (see section 3).
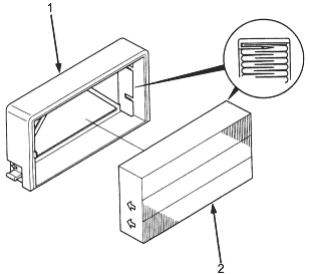
- 1. HOUSING
- 2. FILTER
- 4.Install in the reverse order of removal. Make sure that there is no air leakage.