PDF p. 965 · 20-29
NOTE:
- Wear gloves to remove and install the rear window.
- Do not damage the rear window defogger grid lines, window antenna grid lines and terminals
- 1.Remove the rear window (See Page 20-25).
- 2.Remove the rear window molding.
- 3.Use a putty knife to scrape off of old adhesive and adhesive tape from the rear window, then clean the rear window surface and edge with alcohol. Make sure the bonding surface is kept free of water, oil and grease.
- 4.Apply primer (3M N-200, or equivalent) to the areas between the rear window as shown.
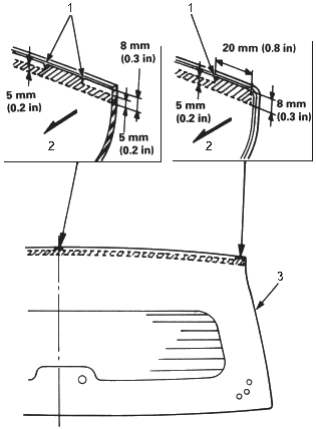
- 1. ALIGNMENT MARK
- 2. Inside
- 3. REAR WINDOW
- 5.Clean the rear window molding.
- 6.Apply primer (3M C-100 or equivalent) to the areas between the rear window Molding as shown, then apply glass adhesive.
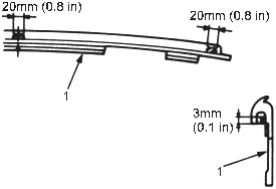
- 1. REAR WINDOW MOLDING
- 7.Glue the rear window molding with adhesive tape to the rear window.
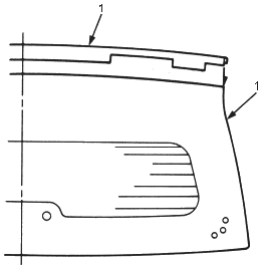
- 1. REAR WINDOW MOLDING
- 8.Scrape or wipe the excess adhesive off with putty knife or towel.
- 9.Install the rear window.