PDF p. 886 · 19-A-9
- 1.Loosen the front wheel nuts slightly, then raise the vehicle and support on safety stands. Remove the front wheels.
- 2.Remove the caliper bolt, and pivot the caliper up out of the way. Check the hoses and pin boots for damage or deterioration.
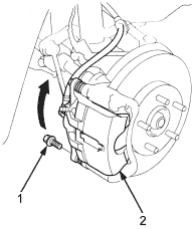
- 1. CALIPER BOLT
- 2. CALIPER BODY
- 3.Remove the pad shims, pad retainers and pads.
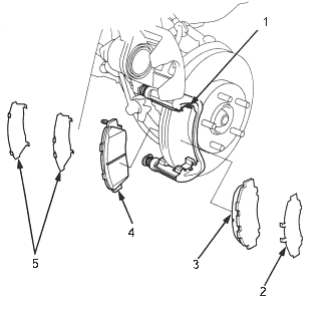
- 1. PAD RETAINERS
- 2. OUTER PAD SHIM, Check for weakness
- 3. OUTER PAD, Check for wear
- 4. INNER PAD, Check for wear
- 5. INNER PAD SHIMS, Check for weakness
- 4.
Using vernier calipers, measure the thickness of each brake pad lining. The measurement does not include the pad backing plate thickness.
Brake Pad Thickness:
Standard: 10.5 - 11.5 mm (0.41 - 0.45 in) Service Limit: 1.6 mm (0.06 in)
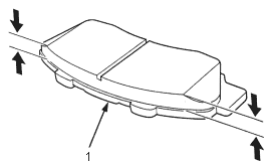
- 1. BACKING PLATE
- 5.If the brake pad thickness is less than service limit, replace the front pads and shims together as a set.
- 6.Clean the caliper thoroughly; remove any rust and check for grooves or cracks.
- 7.Check the brake disc for damage and cracks.
- 8.Install the pad retainers.
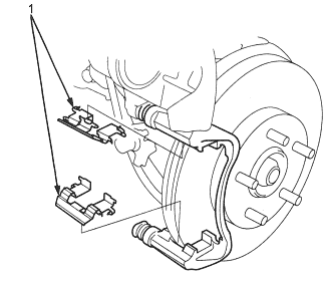
- 1. PAD RETAINERS
PDF p. 887 · 19-A-10
- 9.Apply Molykote M77 grease or Daikalub 528D grease to the pad side of the shims and back of the pads. Wipe excess grease off the shims.
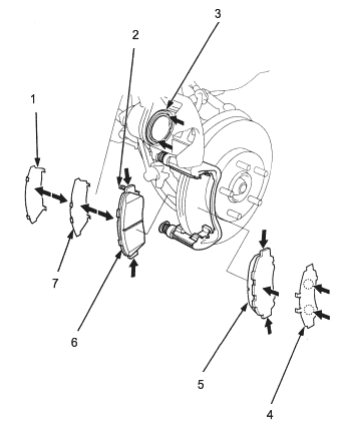
- 1. INNER SHIM B
- 2. WEAR INDICATOR
- 3. PISTON
- 4. OUTER PAD SHIM
- 5. OUTER PAD
- 6. INNER PAD
- 7. INNER SHIM A
- 10.Install the brake pads and pad shims correctly. Install the pad with the wear indicator on the inside.
- 11.Push in the piston so that the caliper will fit over the pads. Make sure that the piston boot is in position to prevent damaging it when pivoting the caliper down.
- 12.Pivot the caliper down into position, being careful not to damage the pin boot. Install the caliper bolt and tighten it.
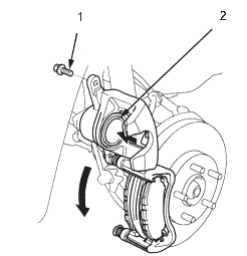
- 1. CALIPER BOLT, 49 Nm (5.0 kgf/m, 36 lbf/ft)
- 2. PISTON
- 13.
Depress the brake pedal several times to make sure the brakes work, then road-test.
NOTE: Engagement of the brake may require a greater pedal stroke immediately after the brake pads have been replaced as a set. Several applications of the brake pedal will restore the normal pedal stroke.
- 14.After installation, check for leaks at hose and line joints or connections and retighten if necessary.