PDF p. 472 · 12-14
Removal/Inspection
- 1.Remove the release fork boot from the clutch housing.
- 2.Remove the release fork and release bearing from the clutch housing.
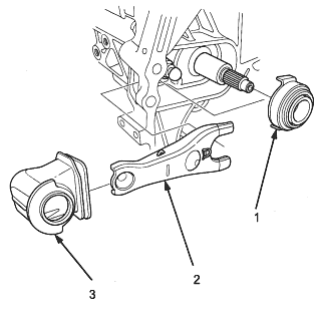
- 1. RELEASE BEARING
- 2. RELEASE FORK
- 3. RELEASE FORK BOOT
- 3.
Check the release bearing for play by spinning it by hand. If there is excessive play, replace the bearing with a new one.
NOTE: The release bearing is packed with grease. Do not wash it in solvent.
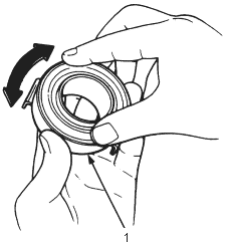
- 1. RELEASE BEARING
Installation
NOTE: Use only HONDA Genuine Urea Grease UM264 (P/N 41211-PY5-305)
- 1.With the release fork slid between the release bearing pawls, install the release bearing on the mainshaft while inserting the release fork through the hole in the clutch housing.
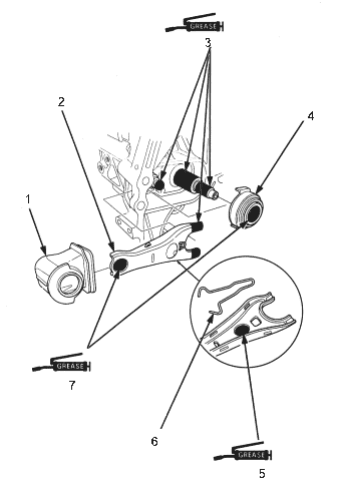
- 1. RELEASE FORK BOOT
- 2. RELEASE FORK
- 3. GREASE (P/N41211-PY5-305)
- 4. RELEASE BEARING
- 5. GREASE, (P/N41211-PY5-305), 1.0 - 1.6 g (0.04 - 0.06 oz)
- 6. RELEASE FORK SPRING
- 7. GREASE, (P/N41211-PY5-305), 0.4 - 1.0 g (0.01 - 0.04 oz)
- 2.Align the detent of the release fork with the release fork bolt, then press the release fork over the release fork bolt squarely.
PDF p. 473 · 12-15
- 3.Move the release fork right and left to make sure that it fits properly against the release bearing, and that the release bearing slides smoothly.
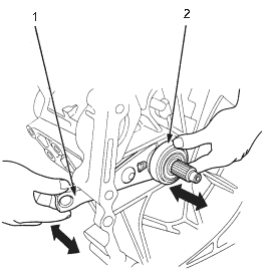
- 1. RELEASE FORK
- 2. RELEASE BEARING
- 4.Install the release fork boot; make sure the boot seals around the release fork and clutch housing.