PDF p. 218 · 4-34
- 1.Remove the four through bolts
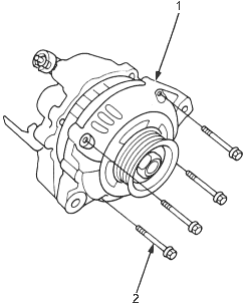
- 1. DRIVE-END HOUSING
- 2. THROUGH BOLT
- 2.Heat the rear bearing seat with a 1,000 W hair drier for about five minutes (50 - 60°C, 120 - 140°F).
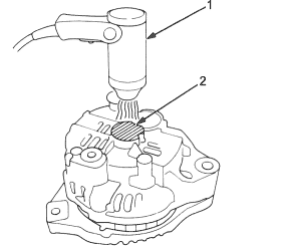
- 1. HAIR DRIER
- 2. REAR BEARING SEAT
- 3.
Separate the rear housing from the drive-end housing by inserting a flat tip screwdriver into the openings and prying them apart.
NOTE: Be careful not to damage the stator with the tip of the screwdriver.
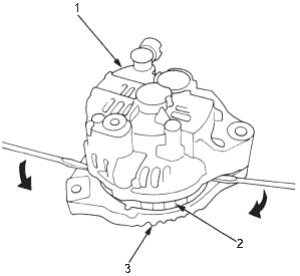
- 1. REAR HOUSING
- 2. STATOR
- 3. DRIVE-END HOUSING
- 4.
Separate the rear housing and drive-end housing.
NOTE: Separate the rear housing and drive-end housing with the stator attached to the rear housing.
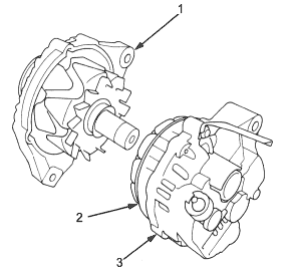
- 1. DRIVE-END HOUSING
- 2. STATOR
- 3. REAR HOUSING
PDF p. 219 · 4-35
- 5.Separate the rear housing from the stator/rectifier assembly by removing the four screws and the terminal nut.
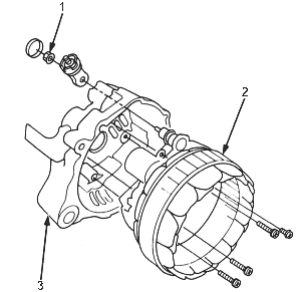
- 1. TERMINAL NUT
- 2. STATOR/RECTIFIER ASSEMBLY
- 3. REAR HOUSING
- 6.Unsolder the rectifier from the stator leads.
- To avoid damaging the diodes with heat, pinch the stator leads between pliers to carry heat off, and apply the soldering iron only long enough to separate the leads from the rectifier.
- Use a 100 W soldering iron.
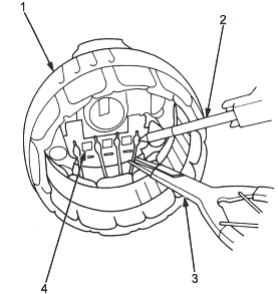
- 1. STATOR
- 2. SOLDERING IRON
- 3. PLIERS
- 4. RECTIFIER DIODE
- 7.Install the new rectifier in the reverse order of removal.
- Apply the soldering iron only long enough to ensure a good connection so that the heat will not damage the diodes.
- Use only a rosin core type solder or solder joints will corrode.