PDF p. 195 · 4-11
- 1.Inspect the armature for wear or damage due to contact with the field winding. If there is wear or damage, replace the armature.
- 2.Check commutator surface and diameter.
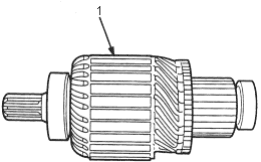
- 1. Inspect for damage.
- If the surface is dirty or burnt, resurface with emery cloth or a lathe within the following specifications, or recondition with #500 or #600 sandpaper.
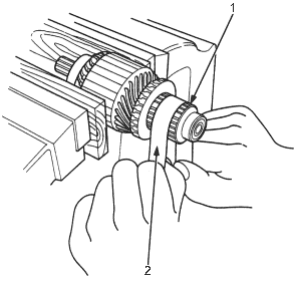
- 1. COMMUTATOR
- 2. SANDPAPER
- If commutator diameter is below the service limit, replace the armature.
Commutator Diameter
Standard (New): 28.0 - 28.1 (1.102 - 1.106 in)
Service Limit: 27.5 mm (1.083 in)
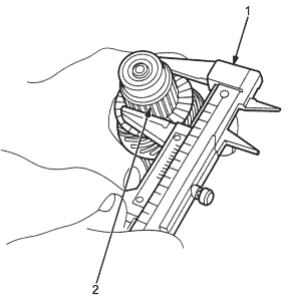
- 1. VERNIER CALIPER
- 2. COMMUTATOR
- 3.Measure the commutator runout.
- If the commutator runout is within the service limit, check the commutator for carbon dust or brass chips between the segments.
- If the commutator runout is not within the service limit, replace the armature. Commutator Runout:
| Standard (New) | 0 - 0.02 mm (0 - 0008 in) |
| Service Limit: | 0.05 - mm (0.002 in) |
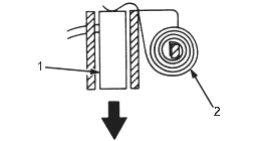
- 1. DIAL INDICATOR
- 2. COMMUTATOR
PDF p. 196 · 4-12
- 4.Check the mica depth. If necessary, undercut the mica with a hacksaw blade to achieve proper depth. If the service limit cannot be maintained, replace the armature.
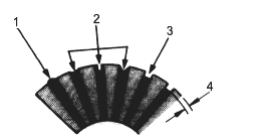
- 1. HIGH MICA
- 2. NOT GOOD
- 3. GOOD
- 4. MICA DEPTH
Commutator Mica Depth
Standard (New): 0.5 - 0.8 mm (0.02 - 0.03 in)
Service Limit: 0.2 mm (0.008 in)
- 5.Check for continuity between the segments of the commutator. If an open circuit exists between any segments, replace the armature.
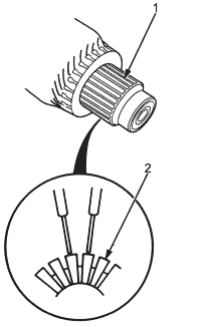
- 1. COMMUTATOR
- 2. COMMUTATOR SEGMENT
- 6.Place the armature on an armature tester. Hold a hacksaw blade on the armature core.
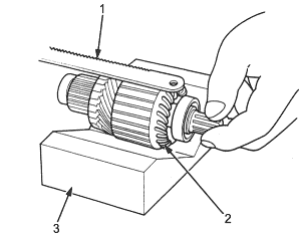
- 1. HACKSAW BLADE
- 2. ARMATURE
- 3. ARMATURE TESTER
If the blade is attracted to the core or vibrates while the core is turned, the armature is shorted. Replace the armature.
- 7.With an ohmmeter, check that no continuity exists between the commutator and the armature coil core, and between the commutator and armature shaft. If there is continuity, replace the armature.
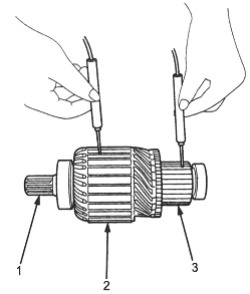
- 1. SHAFT
- 2. COIL CORE
- 3. COMMUTATOR