PDF p. 1238 · 23-F-19
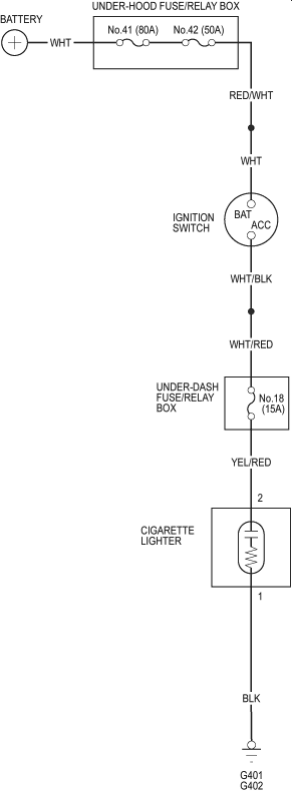
Cigarette Lighter Test
- 1.Remove the centre panel from the dashboard (see section20).
- 2.Remove the radio panel (see section 20).
- 3.Disconnect the 2P connector from the cigarette lighter.
- 4.Inspect the connector terminals to make sure they are all making good contact.
- If the terminals are bent, loose or corroded, repair them as necessary and recheck the system.
- If the terminals look OK, go to step 5.
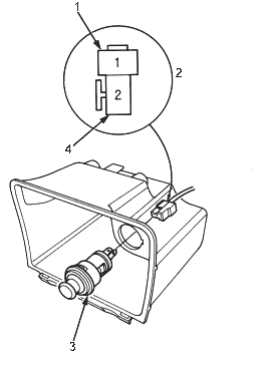
- 1. BLK
- 2. Wire side of female terminals
- 3. CIGARETTE LIGHTER
- 4. YEL/RED
- 5.Turn the ignition switch ON (II) and check for voltage between the No. 2 and No. 1 terminals.
- There should be battery voltage.
- If there is no battery voltage, check for:
- Blown No. 18 (15A) fuse in the under-dash fuse/relay box
- Poor ground (G401, G402)
- An open in the wire.
- 6.If the test proves OK, replace the cigarette lighter.