PDF p. 1237 · 23-F-18
- 1.Remove the centre panel from the dashboard (see section 20).
- 2.Remove the radio panel (see section 20).
- 3.Remove the screws from the bracket.
- 4.Disconnect the 4P connector from the clock.
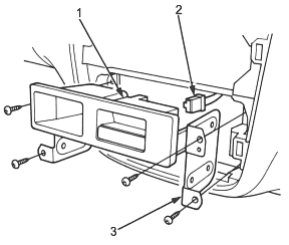
- 1. CLOCK
- 2. 4P CONNECTOR
- 3. BRACKET
- 5.Remove the screws, then remove the clock from the clock pocket.
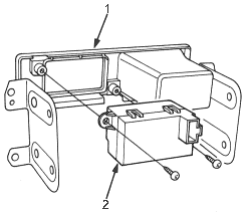
- 1. CLOCK POCKET
- 2. CLOCK
Terminals
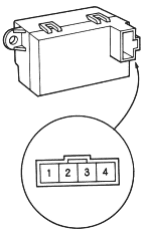
Terminals
| Cavity Wire | Connect to | ||
| 1 | WHT/BLU Constant power (Time memory) | ||
| 2 | RED/BLK | Lights-on signal | |
| 3 | YEL | IG1 (Main clock power supply) | |
| 4 | BLK | Ground | |