PDF p. 1190 · 23-D-24
Component Location Index
NOTE: LHD type is shown, RHD type is symmetrical.
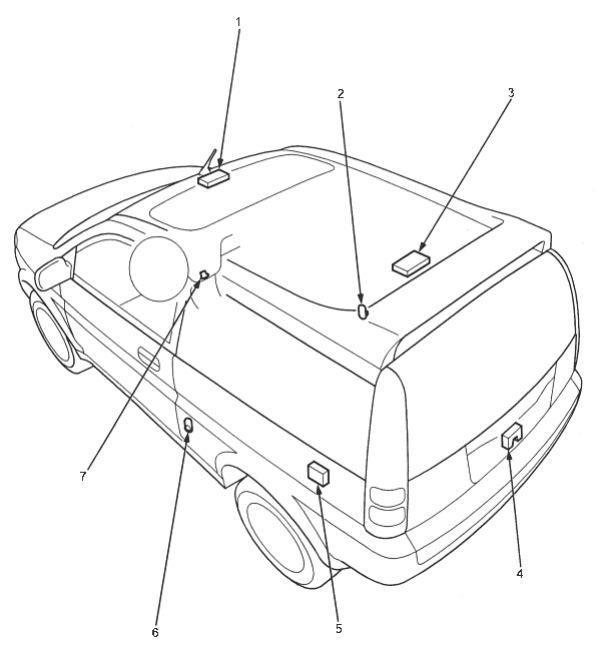
- 1. FRONT CEILING LIGHT
Test (See Page 23-D-26) - 2. PASSENGER’S DOOR SWITCH
- 3. REAR CEILING LIGHT
Test (See Page 23-D-26) - 4. TAILGATE LATCH SWITCH
Test (See Page 23-D-28) - 5. CARGO AREA LIGHT
Test (See Page 23-D-27) - 6. DRIVER’S DOOR SWITCH
- 7. BEVERAGE HOLDER LIGHT Replacement (See Page 23-D-28)
PDF p. 1191 · 23-D-25
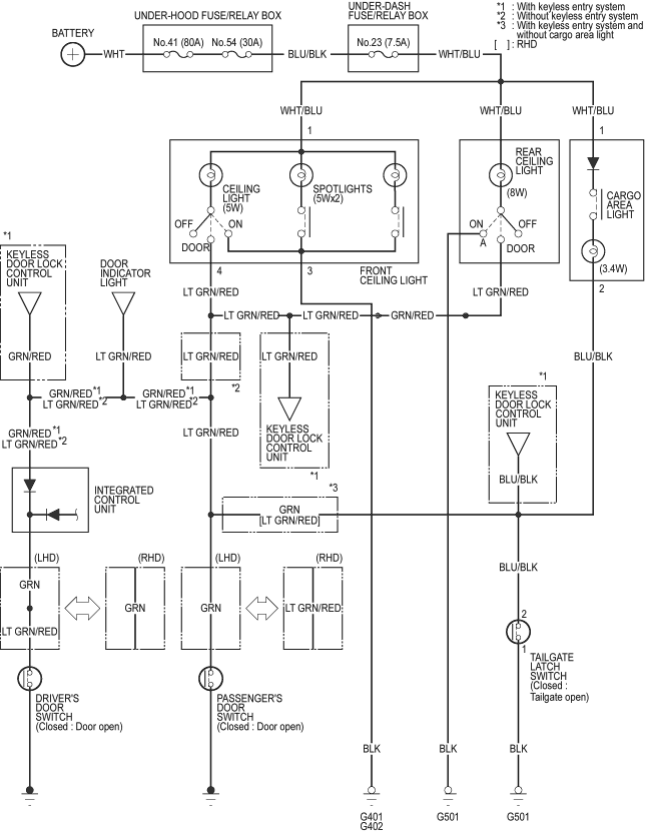
Circuit Diagram
PDF p. 1192 · 23-D-26
Front Ceiling Light Test
- 1.Turn the ceiling light switch off.
- 2.Pry off the lens.
- 3.Remove the two mounting screws from the housing.
- 4.Disconnect the 4P connector and remove the housing.
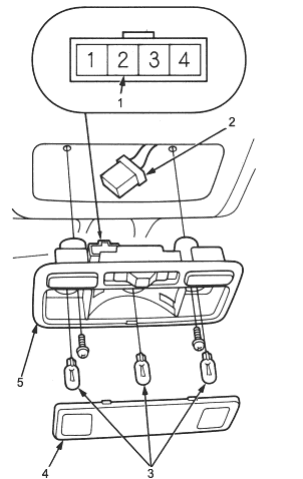
- 1. Not used
- 2. 4P CONNECTOR
- 3. BULB (5W)
- 4. LENS
- 5. HOUSING
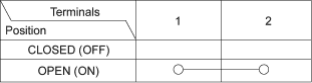
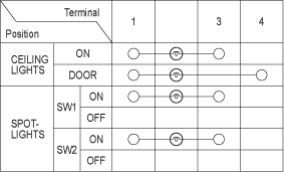
- 5.Check for continuity between the terminals in each switch position according to the table.
Rear Ceiling Light Test
- 1.Turn the light switch OFF.
- 2.Pry off the lens.
- 3.Remove the two screws and the housing.
- 4.Disconnect the 3P connector from the housing.
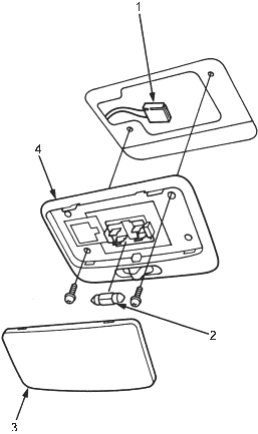
- 1. 3P CONNECTOR
- 2. BULB (8W)
- 3. LENS
- 4. HOUSING
PDF p. 1193 · 23-D-27
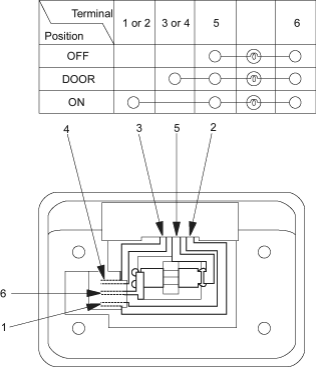
- 5.Check for continuity between the terminals in each switch position according to the table.
Cargo Area Light Test
- 1.Turn the light switch OFF.
- 2.Pry off the lens.
- 3.Pry out the housing, then disconnect the 2P connector from the housing.
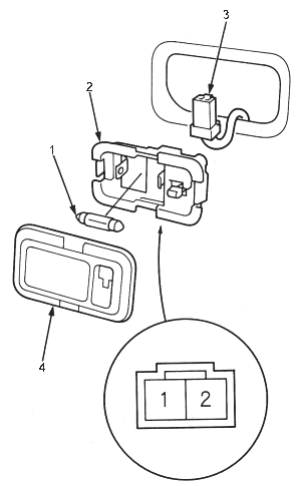
- 1. BULB (3.4W)
- 2. HOUSING
- 3. 2P CONNECTOR
- 4. LENS
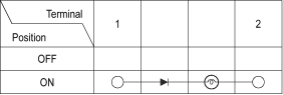
- 4.Check for continuity between the terminals in each switch position according to the table.
PDF p. 1194 · 23-D-28
Beverage Holder Light Replacement
- 1.Remove the centre panel from the dashboard (see section 20).
- 2.Remove the radio panel (see section20).
- 3.Remove the housing from the front console.
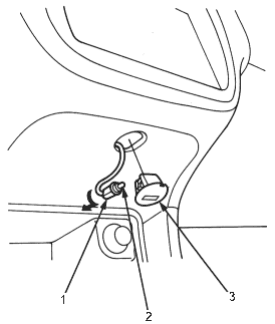
- 1. BULB SOCKET
- 2. BULB (1.4W)
- 3. HOUSING
Tailgate Latch Switch Test
- 1.Open the tailgate.
- 2.Remove the tailgate trim panel (see section 20).
- 3.Disconnect the 2P connector from the tailgate latch switch.
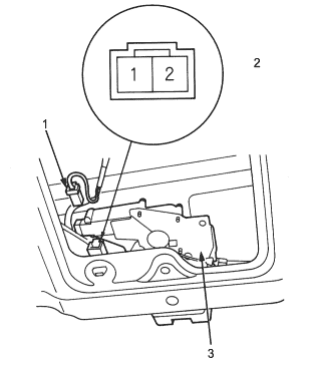
- 1. 2P CONNECTOR
- 2. Terminal side of male terminals
- 3. TAILGATE LATCH SWITCH
- 4.Check for continuity between the terminals in each switch position according to the table.