PDF p. 1697 · 9-3
General Information/Repair Materials and Tools
The front bumper, rear bumper, and side sill panel are made of polypropylene (PP) resin. They can be repaired if the damage or deformation is minor in nature. This section covers PP repair. Repairing PP is different from other resins such as ABS and urethane.
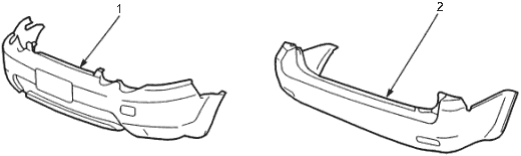
- 1. FRONT BUMPER
- 2. REAR BUMPER
Repair Materials and Tools
The following materials and tools are required to resin bumpers
Adhesive and Filler (examples):
- Bumper primer (clear type)
- Bond quick mender
- High art mat black
- High art thinner
- High art hardener
Primer surfacer (examples):
- Dual-liquid type bumper primer surfacer (grey) Reference (Isam Paint)
- Pigment: (1kg) (35.3 oz)
- Hardener: (100g) (3.5 oz)
- Thinner: (900 m l) (30.4f l . oz, 31.7 Imp. oz)
NOTE: Follow the manufacturer's recommendations.
Tools:
- Putty knife
- Base (putty)
- Sandpaper
- Cutter
- Brush
- Masking tape
- Masking paper
- 1.
Bumper Primer (Clear): Premixed type
The primer provides a good support for the filler and primer surfacer. It is applied to the surface of the bumper.
Drying time:
| Natural | 68°F (20°C) 20 minutes |
| Baked | 140°F (60°C) 10 minutes |
- 2.
PUTTY BOND QUICK MENDER
After the PP primer has dried thoroughly, apply the PUTTY BOND QUICK MENDER.
- -1.Mix one part of the mender (A) and one part of the hardener (B) and stir thoroughly
- -1.
NOTE: Do not mix the mender and hardener in excess of 20g (0.7 oz) at a time.
PDF p. 1698 · 9-4
Materials and Tools
- -2.Hardening starts immediately after mixing. Practical hardness will be obtained within 60 minutes. The surface will be tacky within 5 minutes and nearly hardened after 15 minutes. It takes 12 hours for the surface to harden thoroughly 68°F (20°C).
- -3.Sanding can be done after:
| 3 hours | 68°F (20°C) - natural drying |
| 30 minutes | 140°F (60°C) - baked |
- 3.
Primer Surfacer
NOTE: Use a dual-liquid type bumper primer surfacer (grey).
- The primer surface is used to protect the PP resin surface and to fill cavities or flaws in the intermediate and top coats.
- Mix 10 parts of primer surfacer and 1 part of hardener. Add the specific thinner (30 - 60%) to the mixture of the hardener and primer to attain the proper viscosity for spraying.
- 4.
Intermediate and Top Paint Coats (body colour)
NOTE:
- The paints are the dual liquid type based on the colour chart.
- Measure the pigment and hardener as described so they are in correct ratio.
- Use the acrylic urethane paint prepared according to the mixing chart as the intermediate coat. Mixing Ratio:
Mix 5 parts of body colour pigment to 1 part of additive. Mix 4 parts of the mixture of the pigment and additive with 1 part of the hardener.
NOTE:
- Dilute the mixture with 40 - 50% of the specified thinner (High art Thinner.
- Be sure to mix the correct amount of the additive.
- Use a spray gun to apply the paint. Do not use a brush.
Drying time:
| Natural | 68°F (20°C) |
| Surface only | 20 minutes |
| Almost hardened | 4 hours |
| Thoroughly hardened | 96 hours |
NOTE: The HIGH ART MAT BLACK SURFACER is a dual liquid type. If mixed, it will harden in a matter of hours.
PDF p. 1699 · 9-5
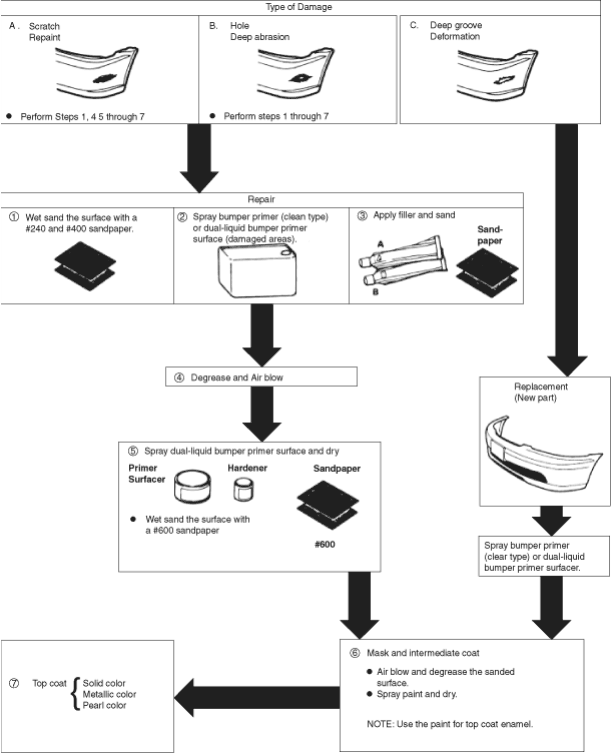
Refinishing Processes
PDF p. 1700 · 9-6
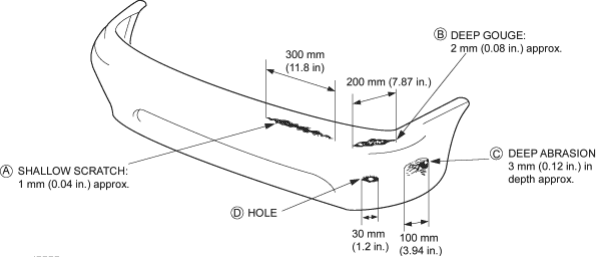
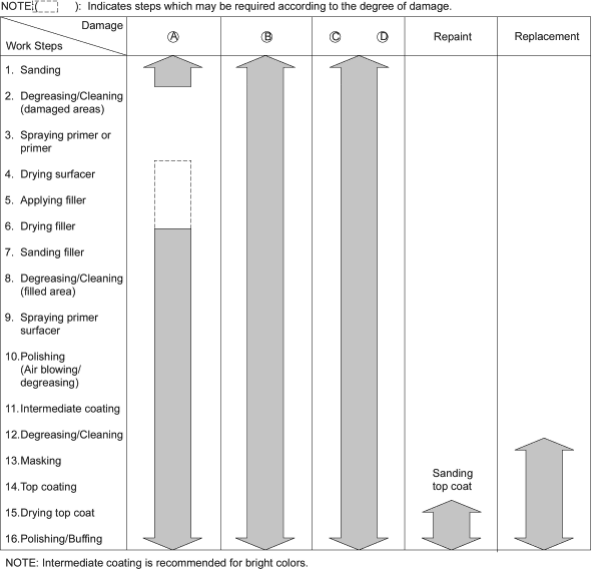
Repair Procedures
PDF p. 1701 · 9-7
Refinishing Procedures
- 1.
Sanding damaged areas
Shallow scratch:
- Level and finish damaged areas with #240 - #400 sandpaper.
- Polish the levelled area with #400 sandpaper
NOTE:
- Use a flexible block to sand the surface evenly.
- Do not remove too much material.
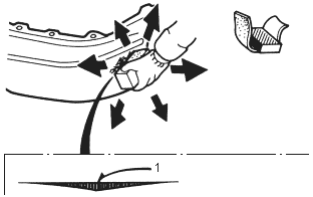
- 1. LEVEL SURFACE EVENLY
Deep groove/tear:
- Level and finish burrs and other irregularities with #240 sandpaper. Keep the surface as even as possible.
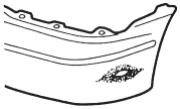
- 2.Degreasing/Cleaning
- Clean with wax and grease remover and dry with compressed air.
- Wipe off all lint and other foreign particles from the surface with a tack cloth.
NOTE: Be sure to use a tack cloth. Dust and dirt are electrostatically drawn to the surface.
- 3.Applying bumper primer (clear type).
- Stir thoroughly before applying the primer. Use a spray gun or brush depending on working conditions.
- Cover as wide an area as possible, except for shallow grooves (2 - 3 coats).
NOTE:
- Do not dilute the primer with thinner.
- Warm the primer if the outside temperature is below 50°F (10°C).
- Apply the primer to the back of the bumper if the damage is a tear or hole.
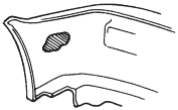
4. Drying bumper primer.
- Dry the primer thoroughly with an infrared dryer or other dryer suitable for the purpose.
PDF p. 1702 · 9-8
If the damage or groove is shallow, heat the entire surface evenly. Apply heat locally if the bumper is gouged or torn open.
Drying time:
| Dryer | 10 minutes 140°F (60°C) |
| Natural | 20 minutes 68°F (20°C) |
NOTE:
- Use a dryer whenever possible.
- Do not allow temperature to exceed 158°F (70°C) or the bumper will deform.
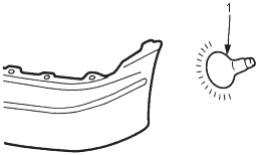
- 1. BELOW 158°F (70°C)
- 5.
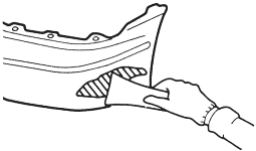
Apply filler (BOND QUICK MENDER)
Mix the mender (A) into the hardener (B) at a ratio of 1 to 1, and stir until they are thoroughly mixed.
- -1.Apply the mixture over the damaged area with a putty knife using light pressure.
- -2.Even out the surface to match the contour of the bumper.
- -3.
If there is a hole, cover it with a masking tape from the back, then apply the filler over the outside surface.
After the filler has been dried, remove the tape and apply filler to the side that was taped.
NOTE: Apply filler so it extends over more than the damaged area.
- -1.
- 6.
Drying filler
Drying time:
| Almost hardened | 5 minutes | |
| Initial hardness | 15 minutes | |
| Practical hardness | 60 minutes | |
| Sanding 68° F (20°C) | After 3 hours | |
| 140°F (60°C) | After 30 minutes | |
- 7.Sanding filler
Wet sand first with #240 sandpaper then with #400 sandpaper.
NOTE: Sand the surface evenly, particularly at the area where the PP resin and mender meet.
- 8.Degreasing/Cleaning
- Blow off the sanded surface, then clean with wax and grease remover.
- Remove all dust and dirt with a tack cloth.
PDF p. 1703 · 9-9
- 9.
Spraying dual-liquid bumper primer surfacer (grey).
NOTE: Use the urethane bumper primer.
Spray the primer surfacer over a wider area than the filler and the exposed surfaces of bumper primer.
NOTE: Spray 2 - 3 coats to get 20 - 25 microns of thickness.
Mixing Ratio: (Reference)
| Urethane bumper primer | 10 |
| Hardener | 1 |
| Thinner | 30 - 60% |
- 10.
Drying and polishing
Force dry the primer surfacer with infrared lamps or other industrial dryer.
Drying temperature:
| Force drying | 140°F (60°C) 20 minutes |
| Natural drying | 68°F (20°C) 2 hours min |
NOTE:
- Use a dryer whenever possible.
- Do not allow the temperature to exceed 158°F (70°C).
- 1. After force drying, wet sand the primer surface with
#600 sandpaper.
NOTE: Use #600 or finer sandpaper as any paper courser than this might scratch the surface.
- -2.Blow the surface to be repaired with compressed air then degrease with a wax and grease remover.
- -3.Also clean and degrease where masking tape will be attached.
- 11.
Intermediate coating
NOTE: Intermediate coating is recommended for bright colours.
- Use the top coat enamel.
- Mix the additive into the solid enamel colour, metallic enamel or pearl enamel colour in the ration of 1 to 5 (by weight).
- Mix the hardener into the mixture of pigment and additive described above in the ratio of 1 to 4 (by weight).
NOTE: Keep the correct ratio, especially of the additive. Excessive additive takes longer to dry.
- Adjust to the proper viscosity for spray by adding the thinner specified for the primer into the mixture of primer additive and hardener. Viscosity: 68°F (20°C) 11 - 13 sec.
PDF p. 1704 · 9-10
NOTE: It is not necessary to apply the clear coat.
- Spray 2 - 3 coats of the top coat enamel to get 15 - 20 microns of thickness. The primer surfacer (grey) should not show through the top coat.
NOTE:
- Apply the top coat enamel to the repaired surface.
- Apply the top coat enamel to the entire surface of the primer surfacer when replacement is necessary.
- 12.
Degreasing and Cleaning
Air dry the entire surface, then clean with wax and grease remover.
NOTE: For shading or spot painting, polish the area with a polishing compound. Also sand with a #1500 sandpaper to make a better bonding surface for the paint.
- 13.Masking
- Remove all existing masking paper, then mask with new paper.
- Use a heat resistant type masking tape (SCOTCH TAPE) where tape is attached directly to the bumper.
- Use brown paper or masking roll paper to cover.
NOTE:
- Mast the area completely to prevent overspray.
- Protect resin parts with aluminium foil under the brown paper or masking paper to prevent damage due to heat during baking.
- 14.Top Coating
- Air dry and degrease the surface before spraying the paint. Also clean the surface with a tack cloth.
- Remove dust and dirt from the surface to be coated with compressed air, then use a tack cloth.
- Use a strainer when filling the cup with paint.
- Spray the paint evenly over the surface so the replacement part is completely covered.
- For application of the top coating refer to step 11 "Intermediate coating".
NOTE: Do not try to cover the surface with one heavy coat. Apply several thin coats.
- With solid colour (2 - coat type), metallic colour and pearl colour enamels, allow final coat to flash-off (5 - 20 minutes) before applying clear coat.
- Mix the additive into the clear at a ratio of 1 to
- 5.Adding the hardener and adjusting viscosity should be done the same way as described on the previous page.
- 5.
Viscosity: 68°F (20°C) 13 - 15 sec.
Mixing Ratio (weight)
| Metallic enamel/Clear | Additive | Hardener | |||
| solid enamel | |||||
| 5 | : | 1 = 4 | : | 1 | |
PDF p. 1705 · 9-11
- 15.Drying top coat
- Before force drying, let it air dry for 5 - 10 minutes.
- Force dry the sprayed surface under the infrared lamps for 60 90 minutes.
Keep the drying temperature between 140°F (60°C) and 158°F (70°C).
NOTE: Take care not to let the head deform the pat during the drying process.
- 16.Polishing and Buffing
- Let the paint dry gradually, then polish the surface carefully using a polishing compound and sponge buff.
To remove lint or dirt, wet sand the surface with #2000 or finer paper first, then polish with compound.
NOTE: Polish all roughness caused by sanding thoroughly. To do this, first polish with very fine compound, then with ultra fine compound.
- After polishing, remove the masking paper and tape and wash the entire vehicle thoroughly.