PDF p. 644 · 14-90
- 1.Raise the front of the vehicle and make sure it is securely supported.
- 2.Set the parking brake and block both rear wheels securely.
- 3.Remove the drain plug and drain the transmission fluid. Reinstall the drain plug with a new sealing washer.
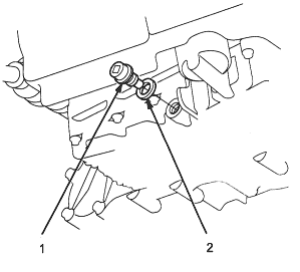
- 1. DRAIN PLUG 18 x 1.5 mm, 49 Nm (5.0 kgf/m, 36 lbf/ft)
- 2. SEALING WASHER Replace
- 4.Remove the splash shield.
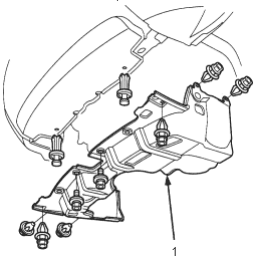
- 1. SPLASH SHIELD
- 5.Remove the rear beam
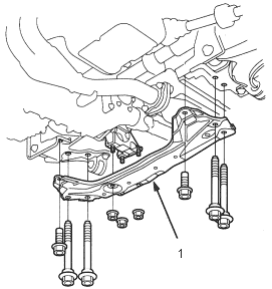
- 1. REAR BEAM
- 6.Remove the exhaust pipe A.
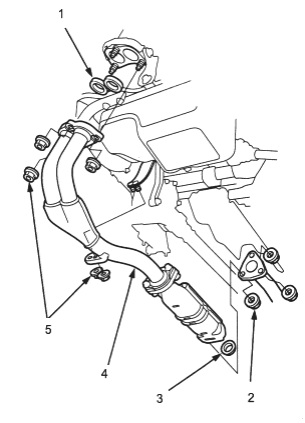
- 1. GASKET Replace.
- 2. SELF-LOCKING NUT Replace.
- 3. GASKET Replace.
- 4. EXHAUST PIPE A
- 5. SELF-LOCKING NUT Replace.
PDF p. 645 · 14-91
- 7.Make a reference mark across the propeller shaft and the transfer assembly flange.
- 8.Separate the propeller shaft from the transfer assembly.
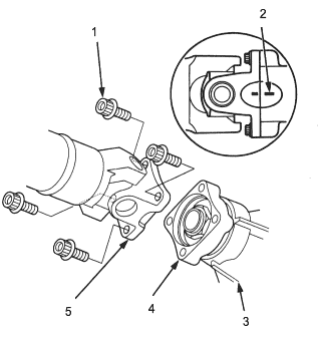
- 1. 8 x 1.25 mm, Replace
- 2. REFERENCE MARK
- 3. TRANSFER ASSEMBLY
- 4. TRANSFER FLANGE
- 5. PROPELLER SHAFT
- 9.Remove the rear stiffener, then remove the transfer assembly from the transmission.
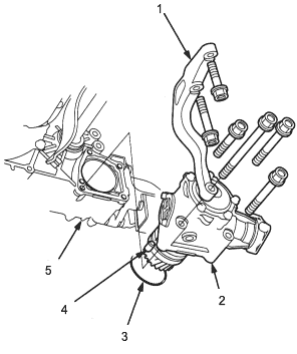
- 1. REAR STIFFENER
- 2. TRANSFER ASSEMBLY
- 3. O-RING Replace.
- 4. DOWEL PIN
- 5. TRANSMISSION