PDF p. 680 · 14-125
2WD
- 1.
Remove the final driven gear from the differential carrier.
NOTE: The final driven gear bolts have left-hand threads.
- 2.Install the final driven gear with its chamfered side on the inner bore facing the differential carrier.
- 3.Tighten the bolts to the specified toque in a criss-cross pattern.
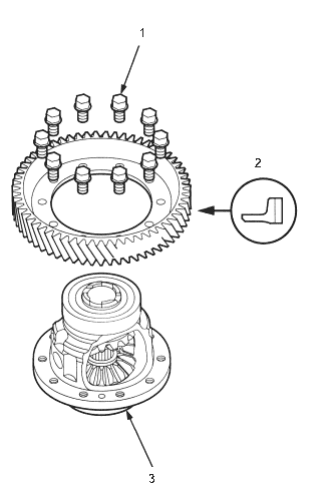
- 1. 10 x 1.5 mm, BOLT, 98.0 Nm (10.0 kgf/m, 72.3 lbf/ft), Left-hand threads.
- 2. FINAL DRIVEN GEAR, Install in this direction.
- 3. DIFFERENTIAL CARRIER
4WD:
- 1.
Remove the transfer drive gear and the final driven gear from the differential carrier.
NOTE: The final driven gear bolts have left-hand threads.
- 2.Install the final driven gear with its chamfered side on the inner bore facing the differential carrier, then install the transfer drive gear on the final driven gear.
- 3.Tighten the bolts to the specified toque in a criss-cross pattern.
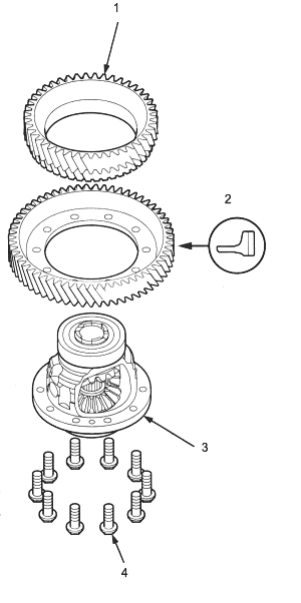
- 1. TRANSFER DRIVE GEAR
- 2. FINAL DRIVEN GEAR, Install in this direction.
- 3. DIFFERENTIAL CARRIER
4 10 x 1.5 mm, BOLT, 98.0 Nm (10.0 kgf/m, 72.3 lbf/ft) Left-hand
threads.