PDF p. 670 · 14-116
- 1.Remove the snap ring, then remove the clutch end plate, clutch discs and plates
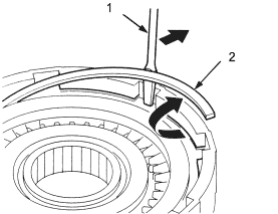
- 1. SCREWDRIVER
- 2. SNAP RING
- 2.Remove the disc spring.
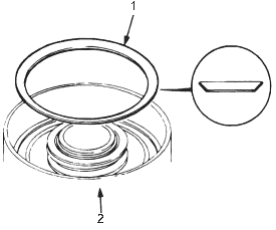
- 1. DISC SPRING
- 2. CLUTCH DRUM
- 3.Install the special tools as shown.
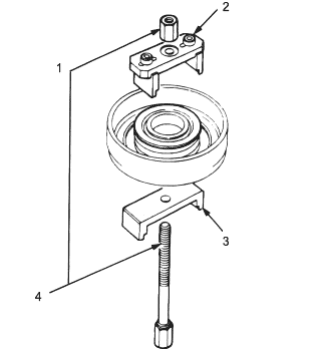
- 1. CLUTCH SPRING COMPRESSOR SET, 07LAE-PX40000
- 2. CLUTCH SPRING COMPRESSOR ATTACHMENT, 07LAE-PX40100
- 3. CLUTCH SPRING COMPRESSOR ATTACHMENT, 07HAE-PL50100
- 4. CLUTCH SPRING COMPRESSOR BOLT ASSEMBLY, 07GAE-PG40200
NOTE: If either end of the special tool is set over an area of the spring retainer which is unsupported by the return spring, the retainer may be damaged. Be sure the special tool is adjusted to have full contact with the spring retainer.
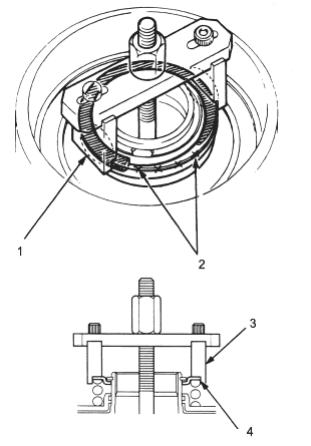
- 1.Set here
- 2.Do not set here
- 3.SPECIAL TOOL
- 4.SPRING RETAINER
PDF p. 671 · 14-117
- 4.Compress the return spring.
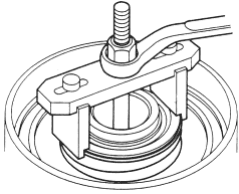
- 5.Remove the snap ring. Then remove the special tools, spring retainer and return spring.
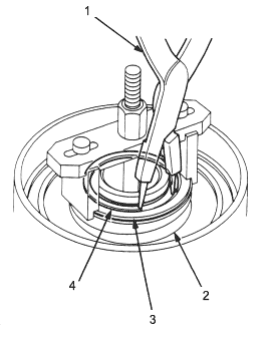
- 1. SNAP RING PLIERS 07LGC-0010100
- 2. RETURN SPRING
- 3. SPRING RETAINER
- 4. SNAP RING
- 6.Wrap a shop rag around the clutch drum and apply air pressure to the fluid passage to remove the piston. Place a finger tip on the other end while applying air pressure.
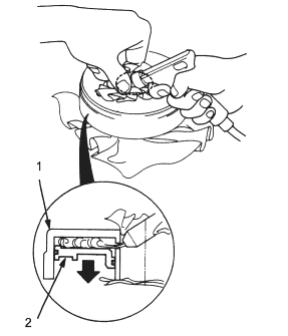
- 1. CLUTCH DRUM
- 2. PISTON