PDF p. 463 · 12-6
NOTE: LHD type is shown, RHD type is symmetrical.
- 1.The brake fluid may be sucked out through the top of the master cylinder reservoir with a syringe.
- 2.Disconnect the clutch pipe and reservoir hose from the clutch master cylinder.
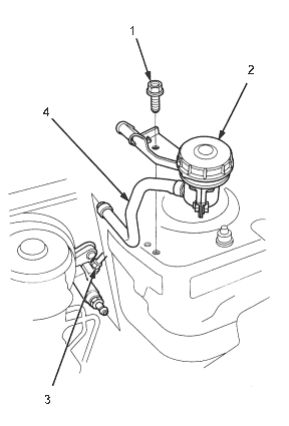
- 1. 6 x 1.0 mm, 9.8Nm (1.0 kgf/m, 7.2 lbf/ft)
- 2. RESERVOIR
- 3. CLUTCH PIPE, 19 Nm (1.9 kgf/m, 14 lbf/ft)
- 4. RESERVOIR HOSE
- 3.Remove the reservoir from the engine compartment bulkhead.
- 4.Pry out the cotter pin and pull the pedal pin out of the yoke. Remove the nuts.
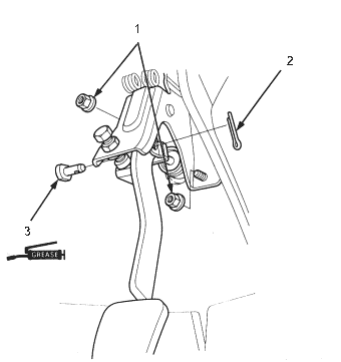
- 1. NUTS, 8 x 1.25 mm, 13 Nm (1.3 kgf/m, 9.4 lbf/ft)
- 2. COTTER PIN, Replace
- 3. PEDAL PIN (Urea grease)
- 5.Remove the clutch maser cylinder.
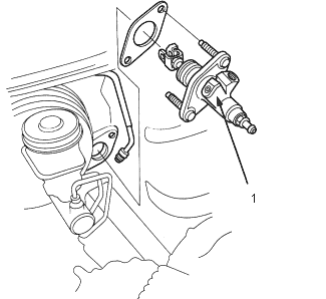
- 1. CLUTCH MASTER CYLINDER
- 6.Install the clutch master cylinder in the reverse order of removal.
- 7.Bleed the clutch hydraulic system (See page 12-9).
PDF p. 464 · 12-7
- 1.Pry the circlip off the clutch master cylinder.
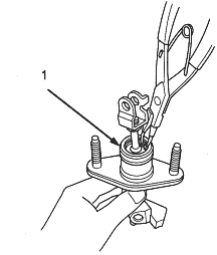
- 1. CLUTCH MASTER CYLINDER
- 2.Carefully remove the piston by applying air pressure through the clutch line hole.
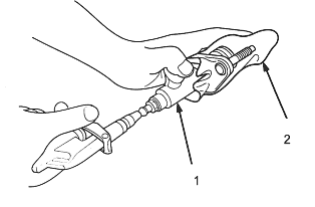
- 1. SHOP TOWEL
- 2. CLUTCH MASTER CYLINDER
- 3.Assemble the piston noting the proper direction of the parts (See page 12-5).
- 4.Slide the piston assembly into the clutch maser cylinder.
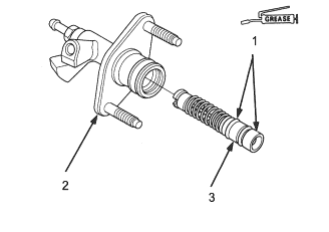
- 1. GREASE (Brake Assembly Lube)
- 2. MASTER CYLINDER BODY
- 3. PISTON ASSEMBLY
Check for wear and damage
- 5.Install the circlip in the groove of the master clutch cylinder.
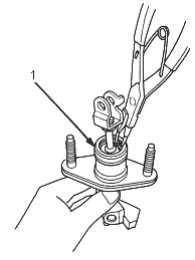
- 1. CLUTCH MASTER CYLINDER