PDF p. 323 · 10-11
- 1.Remove the timing belt, (See Page 6-8).
- 2.Check that the water pump turns counterclockwise.
- 3.
Check for signs of seal leakage.
NOTE: A small amount of “weeping” from the bleed hole is normal.
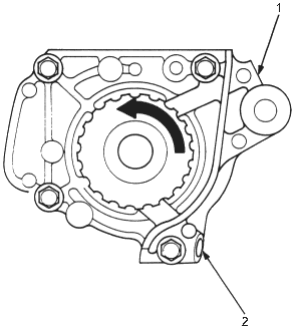
- 1. BLEED HOLE
- 2. BLEED HOLE
Replacement
- 1.Remove the timing belt, (See Page 6-8).
- 2.
Remove the water pump by removing five bolts.
NOTE: Inspect, repair and clean the O-ring groove and mating surface with the cylinder block.
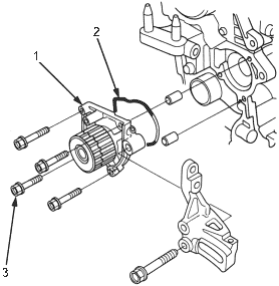
- 1. WATER PUMP
- 2. O-RING. Replace.
- 3. 6 x 1.0 mm, 12 Nm (1.2 kgf/m, 8.7 lbf/ft)
- 3.
Install the water pump in the reverse order of removal.
NOTE:
- Keep the O-ring in position when installing.
- Clean the spilled engine coolant.