PDF p. 146 · 1-13
Before Troubleshooting
- Check applicable fuses in the appropriate fuse/relay box.
- Check the battery for damage, state of charge, and clean and tighten connections.
- Check the alternator belt tension.
Handling Connectors
- Make sure the connectors are clean and have no loose wire terminals.
- Make sure multiple cavity connectors are packed with grease (except waterproof connectors).
- All connectors have push-down release type locks.
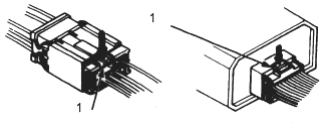
- 1. LOCKING TAB
- Some connectors have a clip on their side used to attach them to a mount bracket on the body or on another component. This clip has a pull type lock.
- Some mounted connectors cannot be disconnected unless you first release the lock and remove the connector from its mount bracket.
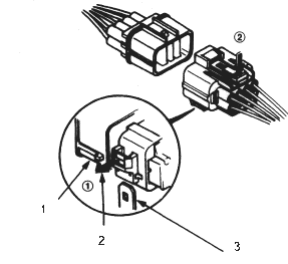
- 1. LOCKING PAWL ON OTHER HALF OF CONNECTOR
- 2. Pull to disengage
- 3. BRACKET
- Never try to disconnect connectors by pulling on their wires; pull on the connector halves instead.
- Always reinstall plastic covers.
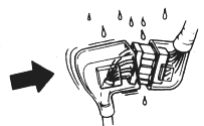
- Before connecting connectors, make sure the terminals are in place and not bent.
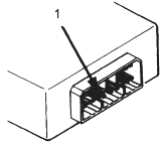
- 1. BENT TERMINAL
- Check for loose retainer and rubber seals.
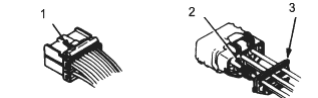
- 1. RETAINER
- 2. RUBBER SEAL
- 3. RETAINER
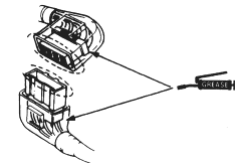
- The backs of some connectors are packed with grease. Add grease if necessary. If the grease is contaminated, replace it.
PDF p. 147 · 1-14
- Insert the connector all the way and make sure it is securely locked.
- Position wires so that the open end of the cover faces down.
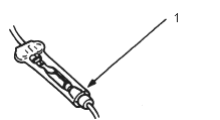
- 1. Face open end down
Handling Wires and Harnesses
- Secure wires and wire harnesses to the frame with their respective wire ties at the designated locations.
- Remove clips carefully; don’t damage their locks.
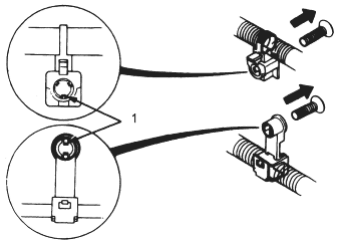
- 1. EXPANSION CLIP LOCKS
Slip pliers under the clip base and through the hole at an angle, then squeeze the expansion tabs to release the clip.
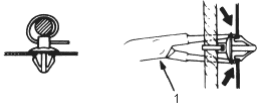
- 1. SNAP RING PLIERS
- After installing harness clips, make sure the harness doesn’t interfere with any moving parts.
- Keep wire harnesses away from exhaust pipes and other hot parts, from sharp edges of brackets and holes, and from exposed screws and bolts.
- Seat grommets in their grooves properly.
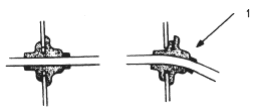
- 1. NOT GOOD
Testing and Repairs
- Do not use wires or harnesses with broken insulation. Replace them or repair them by wrapping the break with electrical tape.
- After installing parts, make sure that no wires are pinched under them.
- When using electrical test equipment, follow the manufacturer’s instructions and those described in this manual.
- If possible, insert the probe of the tester from the wire side (except waterproof connector).
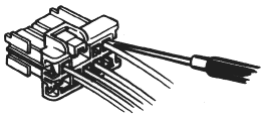
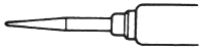
- Use a probe with a sharp tester probe.
PDF p. 148 · 1-15
How to Read Flowcharts
Except SRS:
A flowchart is designed to be used from start to final repair. It’s like a map showing you the shortest distance. But beware: if you go off the “map” anywhere but a “stop” symbol, you can easily get lost.

Describes the conditions or situation to start a troubleshooting flowchart.

Asks you to do something; perform a test, set up a condition etc.

Asks you about the result of an action, then sends you in the appropriate troubleshooting direction.

The end of a series of actions and decisions, describes a final repair action and sometimes directs you to an earlier part of the flowchart to confirm your repair.
SRS:
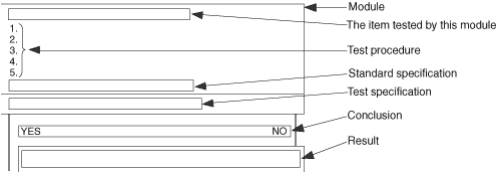
SRS troubleshooting flowcharts are comprised of modules, each of which contains all actions necessary to reach one decision. Except of the steps you must perform, the modules also include standard specifications of a correctly working system and test specifications. If the result of a test meets the specification shown in the module, the conclusion from this test is YES. If the specification is not met, the conclusion is NO. If you do not exactly follow the procedure described in the module, you may get the wrong test result.
NOTE:
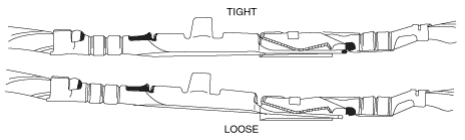
- The term “Intermittent Failure” is used in these charts. It simply means a system may have had a failure, but it checks out OK at this time. If any indicator light on the dash does not come on, check for poor connections or loose wires at all connectors related to the circuit that you are troubleshooting (see illustration below).
- Most of the troubleshooting flowcharts have reset control module(s) or unit(s) and try to duplicate the Diagnostic Trouble Code (DTC). If the problem is intermittent and you cannot duplicate the code, do not continue through the flowchart. To do so will only result in confusion and, possibly, (a) needlessly replace control module(s) or unit(s).
- “Open” and “Short” are common electrical terms. An open is a break in a wire at a connection. A short is an accidental connection of a wire to ground or to another wire. In simple electronics, this usually means something will not work at all. In complex electronics, this can sometimes mean something works, but not the way it is supposed to.
PDF p. 149 · 1-16
Five-step Troubleshooting
- 1.
Verify The Complaint
Turn on all the components in the problem circuit to verify the customer complaint. Note the symptoms. Do not begin disassembly or testing until you have narrowed down the problem area.
- 2.
Analyse The Schematic
Look up the schematic for the problem circuit. Determine how the circuit is supposed to work by tracing the current paths from the power feed through the circuit components to ground. If several circuits fail at the same time, the fuse or ground is a likely cause.
Based on the symptoms and your understanding of the circuit operation, identify one or more possible causes of the problem.
- 3.
Isolate The Problem By Testing The Circuit
Make circuit tests to check the diagnosis you made in step 2. Keep in mind that a logical, simple procedure is the key to efficient troubleshooting. Test for the most likely cause of failure first. Try to make tests at points that are easily accessible.
- 4.
Fix The Problem
Once the specific problem is identified, make the repair. Be sure to use proper tools and safe procedures.
- 5.
Make Sure The Circuit Works
Turn on all components in the repaired circuit in all modes to make sure you have fixed the entire problem. If the problem was a blown fuse, be sure to test all of the circuits on the fuse. Make sure no new problems turn up and the original problem does not recur.
Wire Colour Codes
The following abbreviations are used to identify wire colours in the circuit schematics:
| WHT | White |
| YEL | Yellow |
| BLK | Black |
| BLU | Blue |
| GRN | Green |
| RED | Red |
| ORN | Orange |
| PNK | Pink |
| BRN | Brown |
| GRY | Grey |
| PUR | Purple |
| LT BLU | Light Blue |
| LT GRN | Light Green |
The wire insulation has one colour or one colour with another colour stripe. The second colour is the stripe.
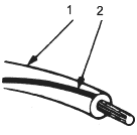
- 1. WHT
- 2. BLK
NOTE:
Different wires with the same colour in the same system have been given number suffixes to distinguish them (for example, YEL1 and YEL2 are not the same).
PDF p. 150 · 1-17
When checking any control module(s) or units(s) connector terminals, gently slide the sharp tester probe from the wire side into the connector until it comes in contact with the terminal end of the wire.
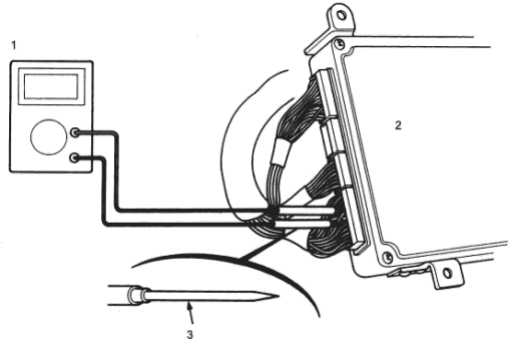
- 1. DIGITAL CIRCUIT TESTER (Commercially available) or 07411-0020000
- 2. ANY CONTROL MODULE OR UNIT
- 3. SHARP TESTER PROBE
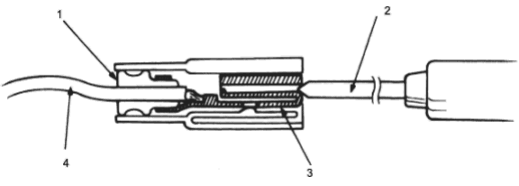
- 1. RUBBER SEAL
- 2. TESTER PROBE
- 3. TERMINAL
- 4. WIRE HARNESS