PDF p. 997 · 20-61
NOTE:
- Take care not tear the seams or damage the seat covers.
- Wear gloves to protect your hands.
Seat-back cover:
- 1.Remove the seat-backs seat (See Page 20-59).
- 2.If equipped with headrests, remove.
- 3.Remove the screws and clip, then remove the seat-back latch cover.
 : Screw locations, 1
 : Clip locations, 2
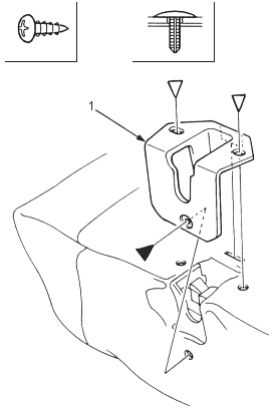
- 1. SEAT-BACK LATCH COVER
- 4.Remove the latch lever cover.
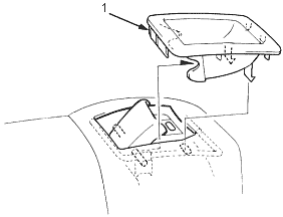
- 1. LATCH LEVER COVER
- 5.Release the hooks and unzip the cover, then fold back the seat cover.
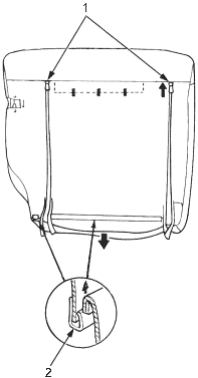
- 1. ZIPPER
- 2. HOOK
- 6.Remove the seat-back frame, then remove the headrest guides.
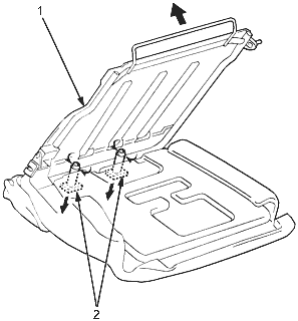
- 1. SEAT-BACK FRAME
- 2. HEADREST GUIDES
PDF p. 998 · 20-62
- 7.Pull back the edge of the seat-back cover all the way around and release the clips, then remove the seat-back cover.
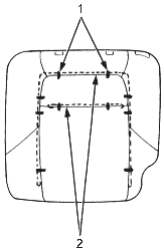
- 1. CLIP
- 2. WIRE (PAD SIDE)
- 8.Install in the reverse order of removal and note the following items:
- To prevent wrinkles when installing a seat-back cover, make sure the material is stretched evenly over the pad before securing the clips, hooks and inside springs.
- Replace the released clips with new ones, using commercially available upholstery ring pliers.
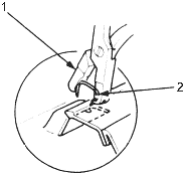
- 1. UPHOLSTERY RING PLIERS
- 2. NEW CLIP
Seat cushion cover:
- 1.Remove the seat cushion (See Page 20-59).
- 2.Release all the clips.
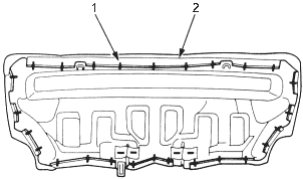
- 1. CLIP
- 2. SEAT CUSHION COVER
- 3.Pull back of the seat-back cover all the way around and release the clips and hooks from the pad.
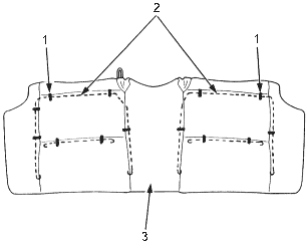
- 1. CLIP
- 2. WIRE(PAD SIDE)
- 3. SEAT CUSHION COVER
PDF p. 999 · 20-63
- 4.Install in the reverse order of removal and note these items:
- To prevent wrinkles when installing a seat cushion cover, make sure the material is stretched evenly over the pad before securing the clips, hooks and inside springs
- Replace the release clips with new ones using commercially available upholstery ring pliers.
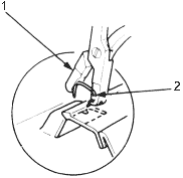
- 1. UPHOLSTERY RING PLIERS
- 2. NEW CLIP