PDF p. 1014 · 20-78
NOTE:
- Take care not to scratch the body and related parts.
- Using a flat-tip screwdriver wrapped with protective tape.
- 1.Remove the caps from the roof spoiler, then remove the bolts (use Torx T-30 bit).
- 2.Slide the roof spoiler behind and remove it. Slide clips will stay on the roof side trim bracket.
 : Bolt locations, 2
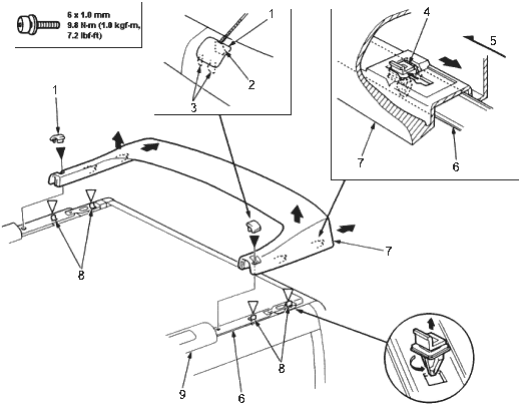
- 1. CAP
- 2. CLIP
- 3. CLIPS
- 4. SLIDE CLIP, 4
- 5. Forward
- 6. ROOF SIDE TRIM BRACKET
- 7. ROOF SPOILER
- 8. SLIDE CLIPS
- 9. ROOF SIDE TRIM
- 3.Remove the slide clips from the roof side trim bracket, then install the slide clips to the roof spoiler. Replace any damaged clips.
PDF p. 1015 · 20-79
- 4.Remove the caps from the roof side trim, then remove the nuts.
- 5.Lift and slide the roof side trim behind and remove it.
 : Nut locations 1. ROOF SIDE CLIP
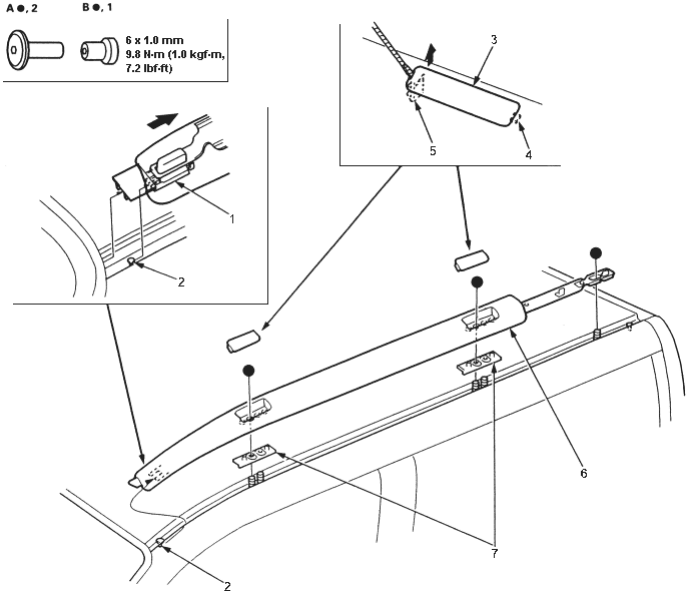
- 2. PIN
- 3. CAP
- 4. HOOK
- 5. CLIP
- 6. ROOF SIDE TRIM
- 7. BRACKETS
- 6.Install in the reverse of removal and note these items:
- Replace any damaged clip.
- Install the roof spoiler, fit all the slide clips into the holes in the roof side trim, then push on the roof spoiler until the clips snap into place.