PDF p. 483 · 13-10
- 1.Disconnect the negative (-) cable first, then the positive (+) cable from the battery. Remove the battery.
- 2.Carefully remove the slave cylinder and clutch line clamp so as not to bend the clutch line.
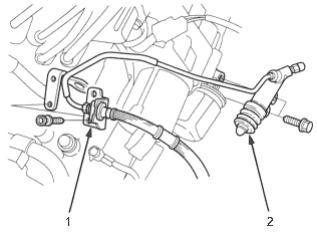
- 1. CLUTCH HOSE BRACKET
- 2. SLAVE CYLINDER
- 3.Disconnect the starter motor cable and transmission ground cable.
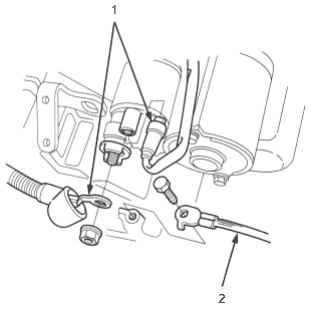
- 1. STARTER CABLES
- 2. TRANSMISSION GROUND CABLE
- 4.Remove the wire harness clamp.
- 5.Disconnect the back-up light switch connector.
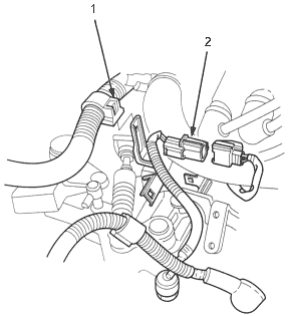
- 1. WIRE HARNESS CLAMP
- 2. BACK-UP LIGHT SWITCH CONNECTOR
PDF p. 484 · 13-11
- 6.Remove the cotter pins, then remove the steel washers, plastic washers, shift cables and select cable from the levers.
- 7.Remove the cable bracket from the clutch housing.
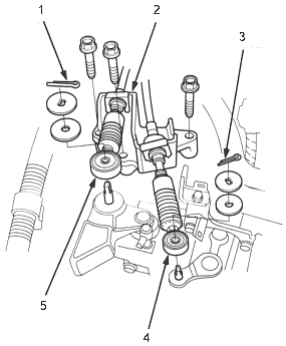
- 1. COTTER PIN, Replace
- 2. CABLE BRACKET
- 3. COTTER PIN, Replace
- 4. SELECT CABLE
- 5. SHIFT CABLE
- 8.Disconnect the vehicle speed sensor (VSS) connector.
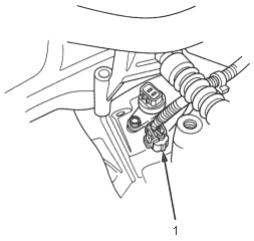
- 1. VSS CONNECTOR
- 9.Remove the three upper transmission mounting bolts.
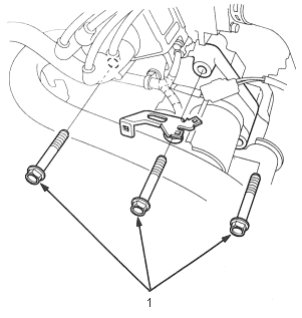
- 1. TRANSMISSION MOUNTING BOLTS
- 10.Drain the MTF (See page 13-4).
- 11.Remove the splash shield.
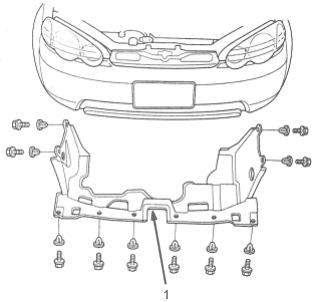
- 1. SPLASH SHIELD
PDF p. 485 · 13-12
- 12.Hold the stabiliser link ball joint pin with a hexagonal wrench and remove the flange nut, then separate the front stabiliser link and front stabiliser.
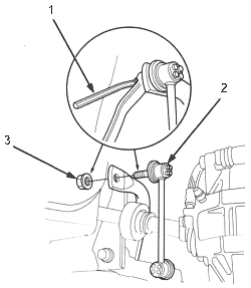
- 1. HEXAGONAL WRENCH
- 2. FRONT STABILISER LINK
- 3. FLANGE NUT
- 13.Remove the lock pins and loosen the castle nuts, then separate the knuckle and lower arms on both sides (see section 18).
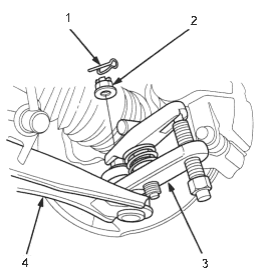
- 1. LOCK PIN, Replace
- 2. CASTLE NUT
- 3. BALL JOINT REMOVER, 28 mm, 07MAC-SL00200
- 4. LOWER ARMS
- 14.Pull the driveshafts out of the intermediate shaft and differential. Coat all the precision finished surfaces with clean engine oil grease. Tie plastic bags over the driveshaft ends.
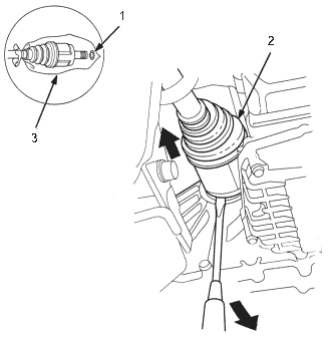
- 1. SET RING, Replace
- 2. DRIVE SHAFT
- 3. PLASTIC BAG
- 15.Remove the intermediate shaft. Coat all the precision finished surfaces with clean engine oil grease. Tie bags over the driveshaft ends.
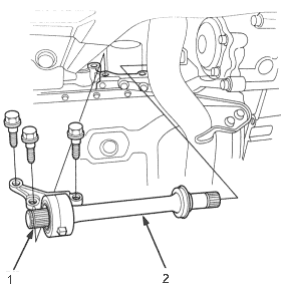
- 1. SET RING, Replace
- 2. INTERMEDIATE SHAFT
PDF p. 486 · 13-13
- 16.Remove the exhaust pipe A.
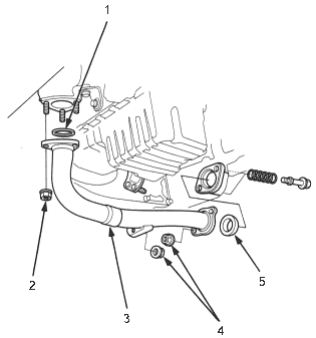
- 1. GASKET, Replace
- 2. SELF-LOCKING NUT, Replace
- 3. EXHAUST PIPE A
- 4. SELF-LOCKING NUT, Replace
- 5. GASKET, Replace
- 17.Remove the rear beam.
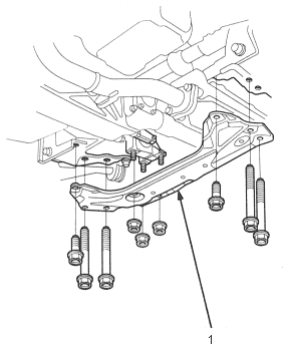
- 1. REAR BEAM
- 18.Remove the rear engine mount bracket/rubber assembly.
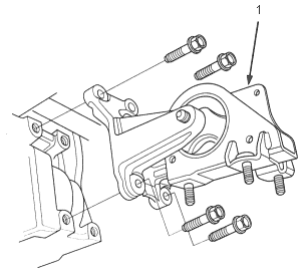
- 1. REAR ENGINE MOUNT BRACKET/RUBBER
- 19.Make reference marks across the propeller shaft and the transfer assembly flanges (only SEPM model manual transmission).
- 20.Separate the propeller shaft from the transfer assembly flanges (only SEPM model manual transmission).
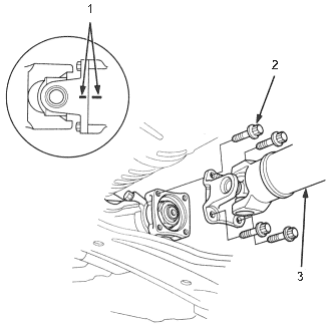
- 1. REFERENCE MARKS
- 2. 8 x 1.25 mm, Replace
- 3. PROPELLER SHAFT
PDF p. 487 · 13-14
- 21.Remove the engine stiffener(s).
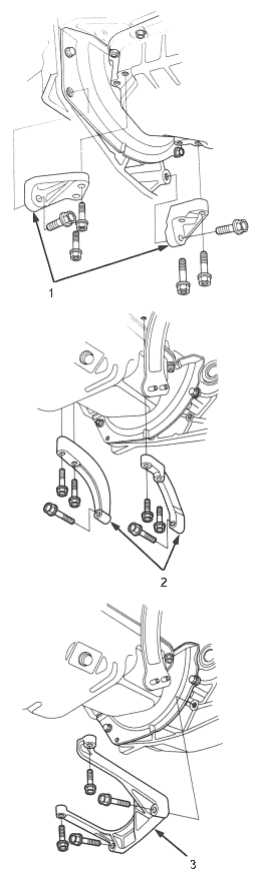
- 1. ENGINE STIFFENERS
- 2. ENGINE STIFFENERS
- 3. ENGINE STIFFENER
- 22.Remove the clutch cover.
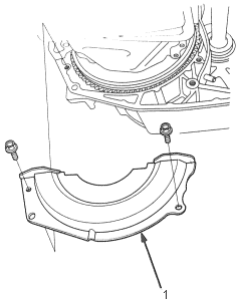
- 1. CLUTCH COVER
- 23.Remove the right front stopper rubber/bracket.
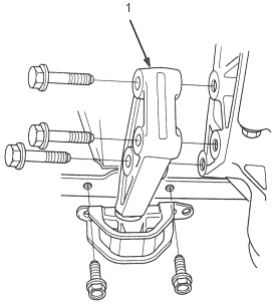
- 1. RIGHT FRONT STOPPER RUBBER/BRACKET
PDF p. 488 · 13-15
- 24.Place a floor jack under the transmission and raise the transmission just enough to take the weight off the mounts.
- 25.Remove the transmission mount bracket and transmission mount rubber.
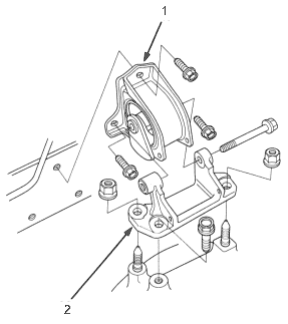
- 1. TRANSMISSION MOUNT RUBBER
- 2. TRANSMISSION MOUNT BRACKET
- 26.Remove the two lower transmission mounting bolts.
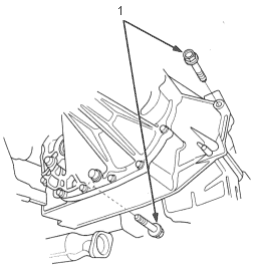
- 1. TRANSMISSION MOUNTING BOLTS
- 27.Pull the transmission away from the engine until it clears the mainshaft, then lower it on the transmission jack. Take care not to bend the clutch line.
- 28.Remove the starter motor and hose clamp from the transmission housing.
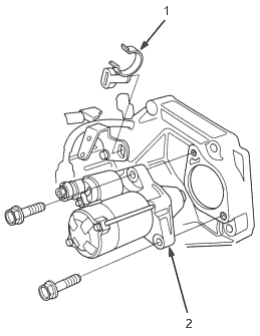
- 1. HOSE CLAMP
- 2. STARTER MOTOR
- 29.Remove the release fork boot, release bearing and release fork from the clutch housing.
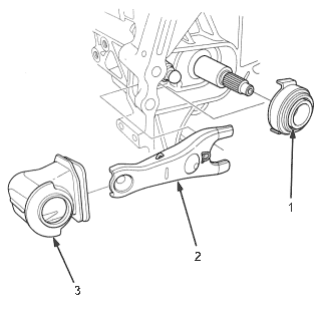
- 1. RELEASE BEARING
- 2. RELEASE FORK
- 3. RELEASE FORK BOOT